

First Step
Open TinkerCode app in your browser
Click here to go to TinkerCode app!
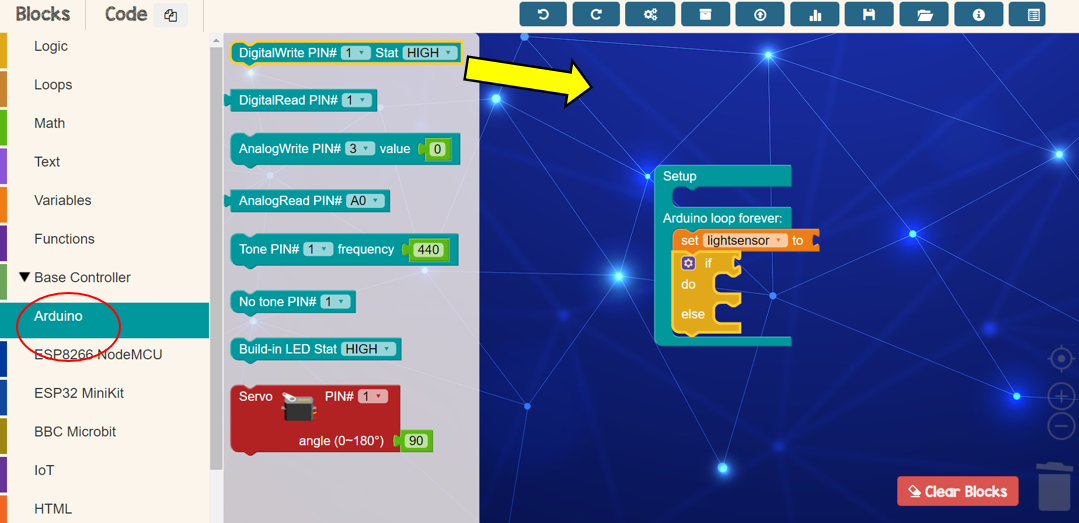
Second Step
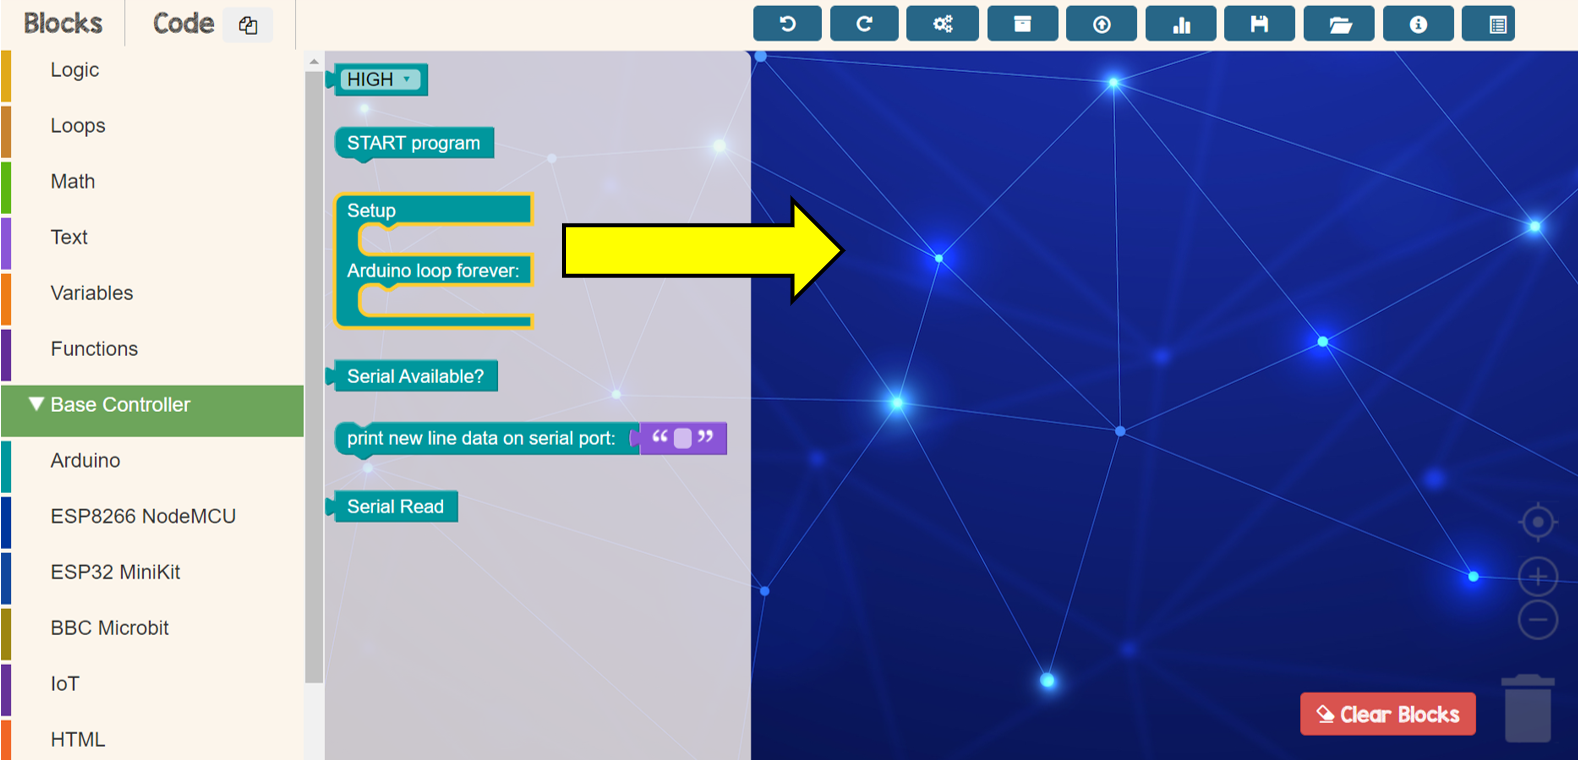
Drop setup block and adruino loop from Base Controller menu
Third Step
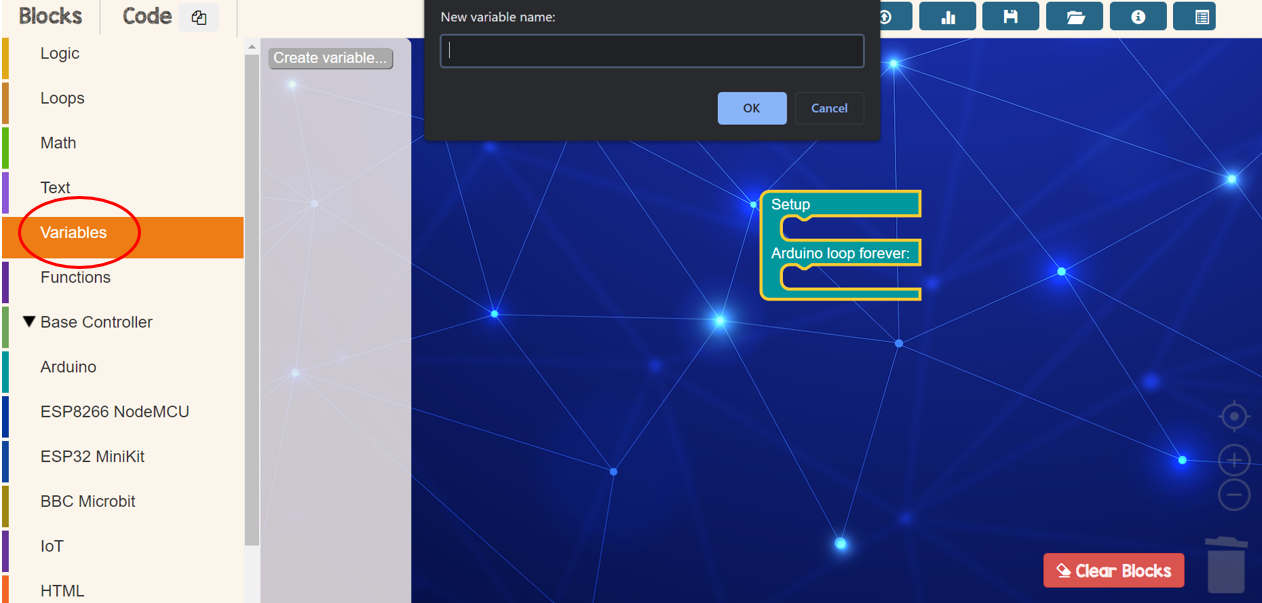
Create new variable with any names suitable from Variables menu

Fourth Step
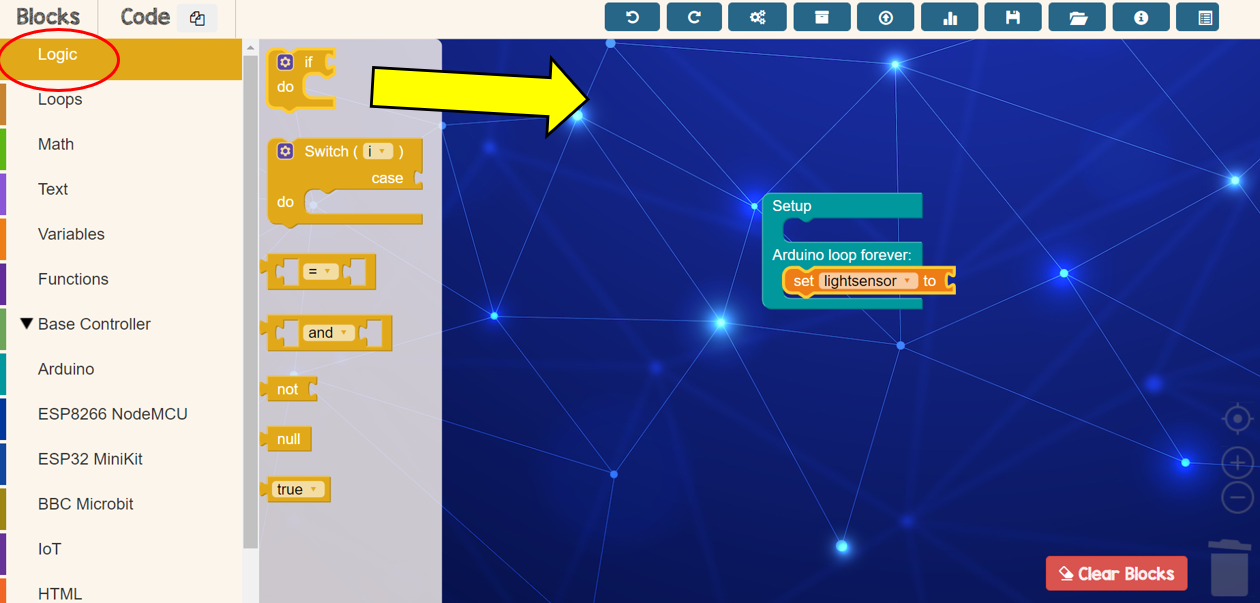
Drop the variable name’s block that you created
Fifth Step
Go to Loops menu and drop ‘if — do’ block under the variable block

Sixth Step
Click the ‘setting’ icon and drag else under if
Seventh Step
Drop DigitalWhite block from Adruino menu beside word ‘do’
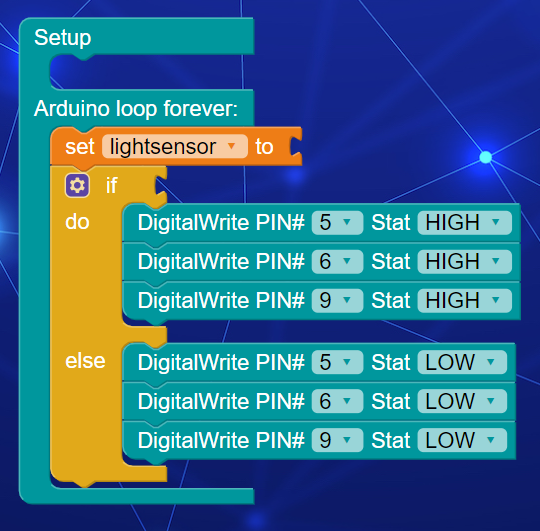
Eighth Step
Duplicate DigitalWrite block by right clicked at the block > Duplicate. Next, set all pin follow the LED pin. Set Stat HIGH equal to ON and LOW equal to OFF
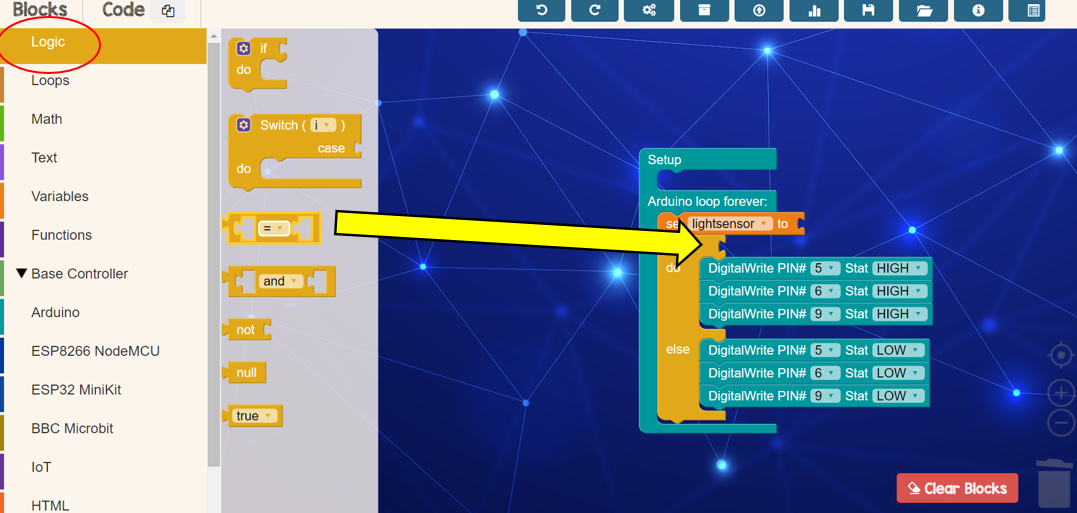
Ninth Step
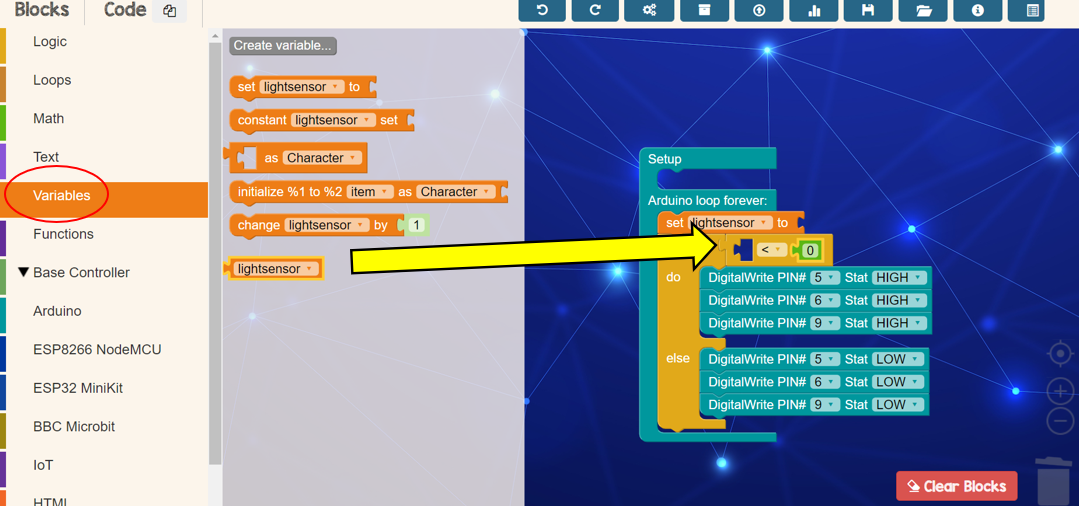
Drop the mathematical symbol block form Logic menu and choose ‘<‘ symbol
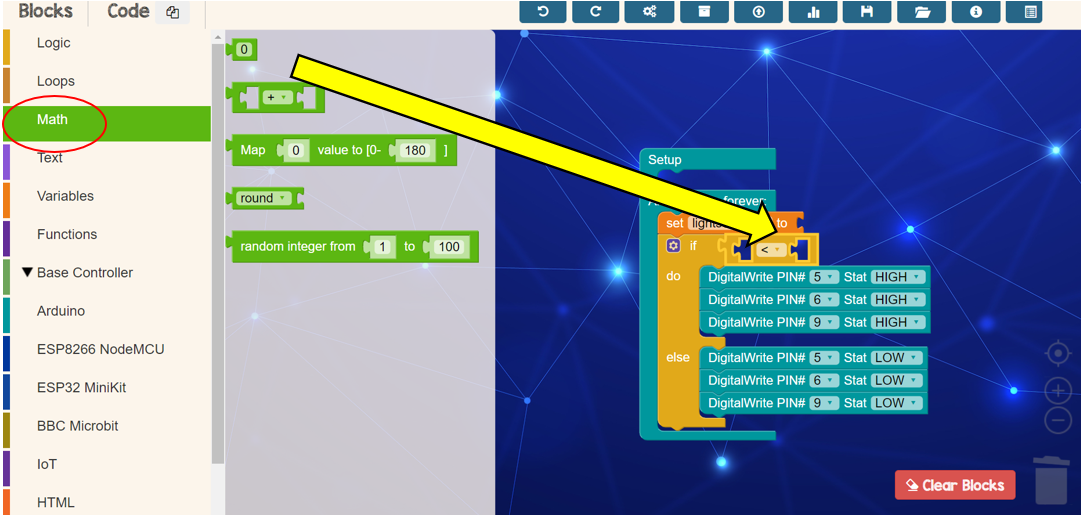
Tenth Step
Drop number block form Math menu inside the mathematical symbol block and set range 900
Eleventh Step
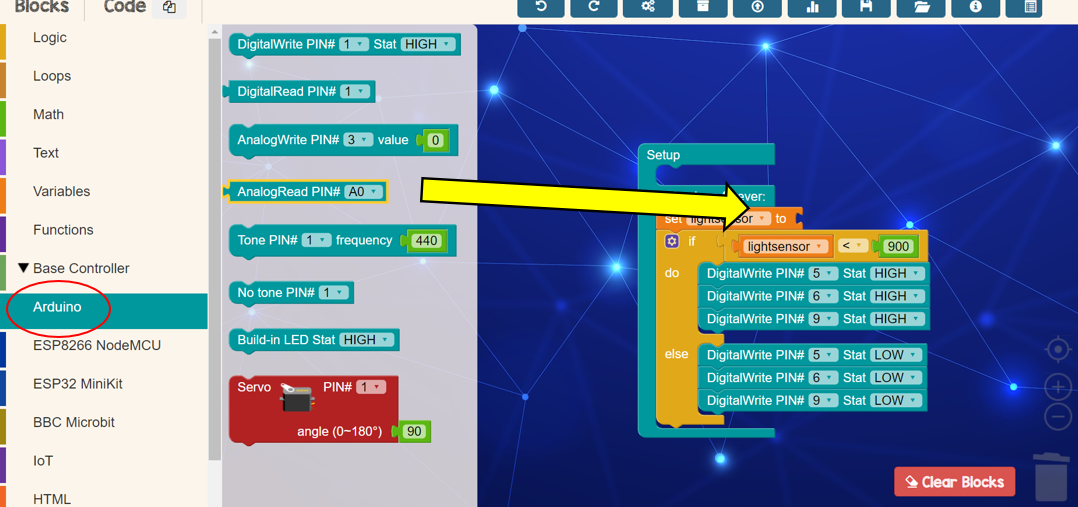
Drop the variable block that you have created from Variable menu into the other side of mathematical symbol block
Twelfth Step
Drop AnalogRead block from Adruino menu and set pin to A7
Thirteenth Step
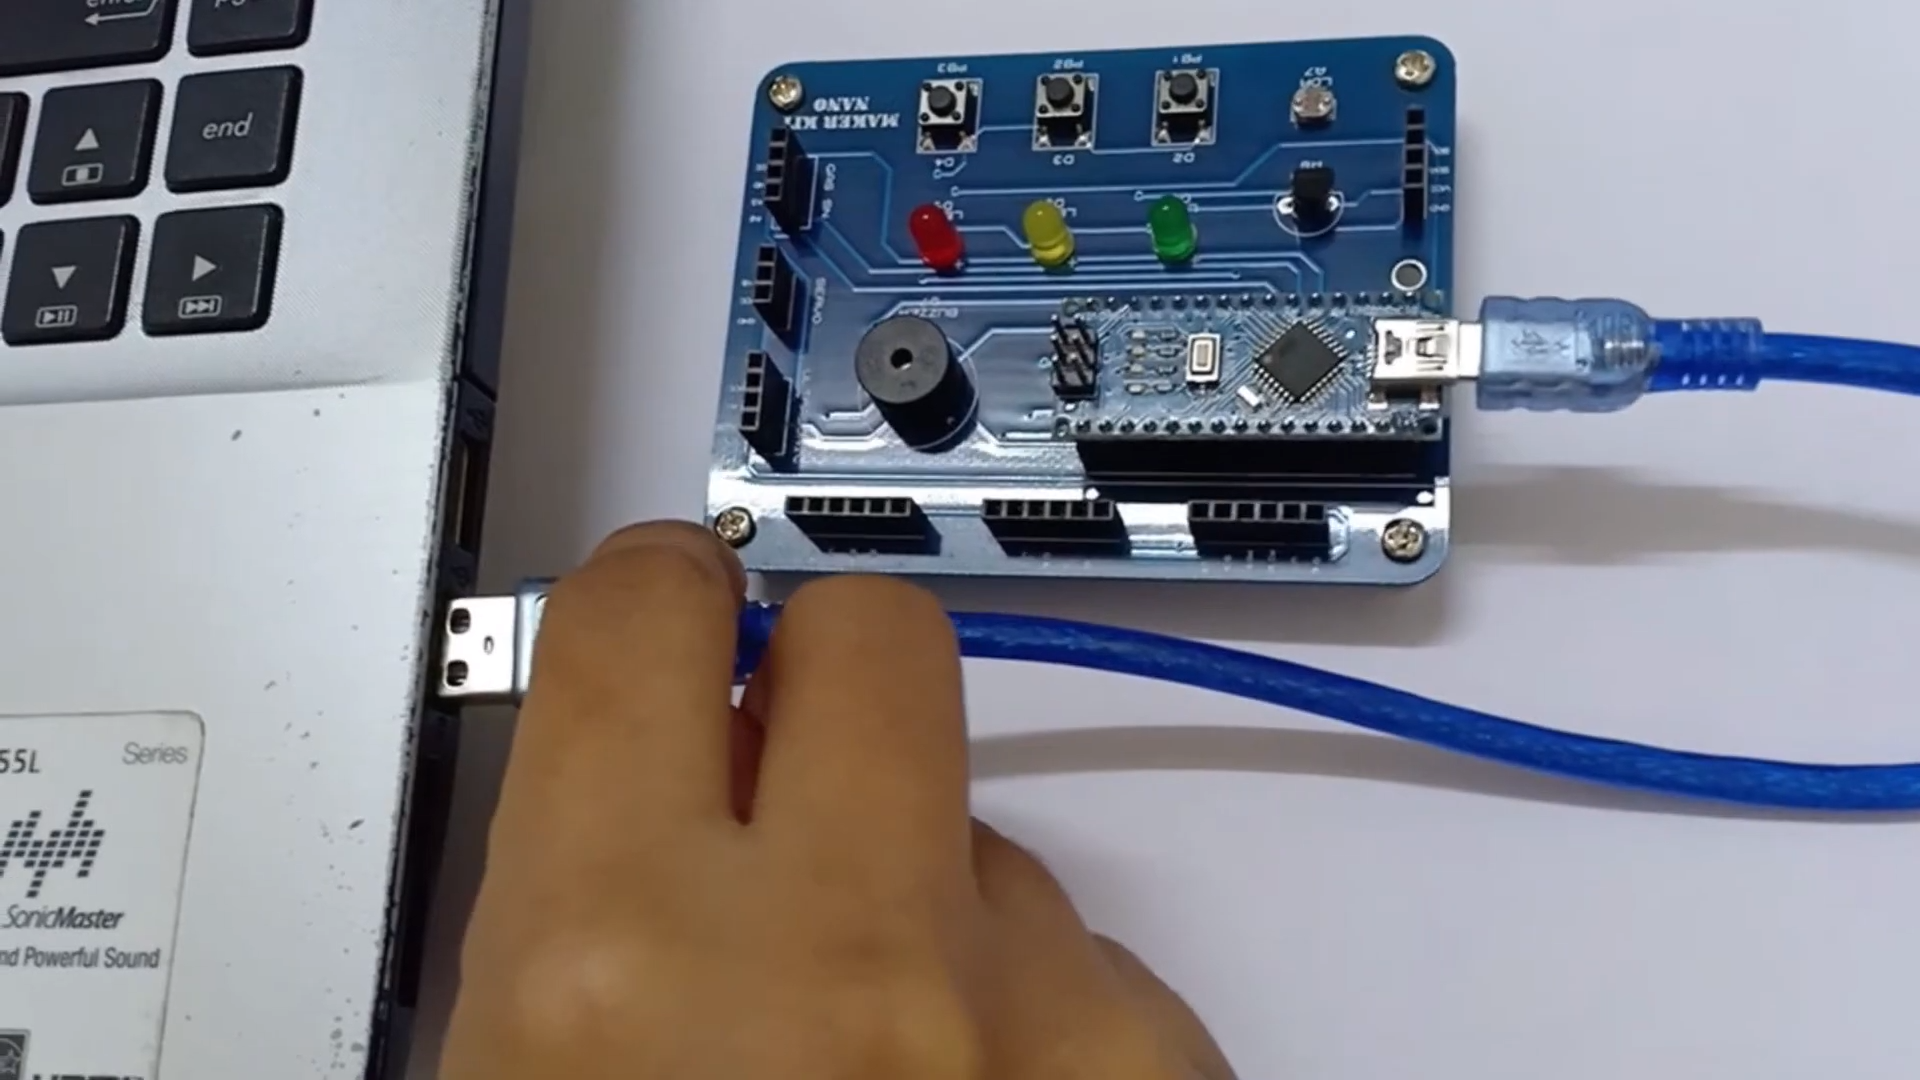
Plug in Maker Kit USB to your laptop or computer
Fourteenth Step
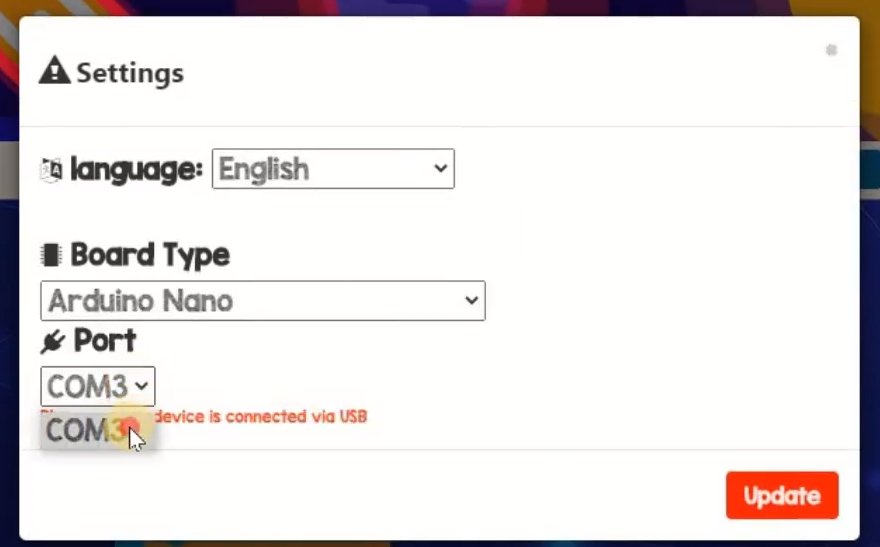
Set Board Type and Port in setting according your Maker Kit port. Next, click Update button

Fifteenth Step
Finally, click upload button to upload your program to Maker Kit device

Awesome pop up says your program is all set. See the result!
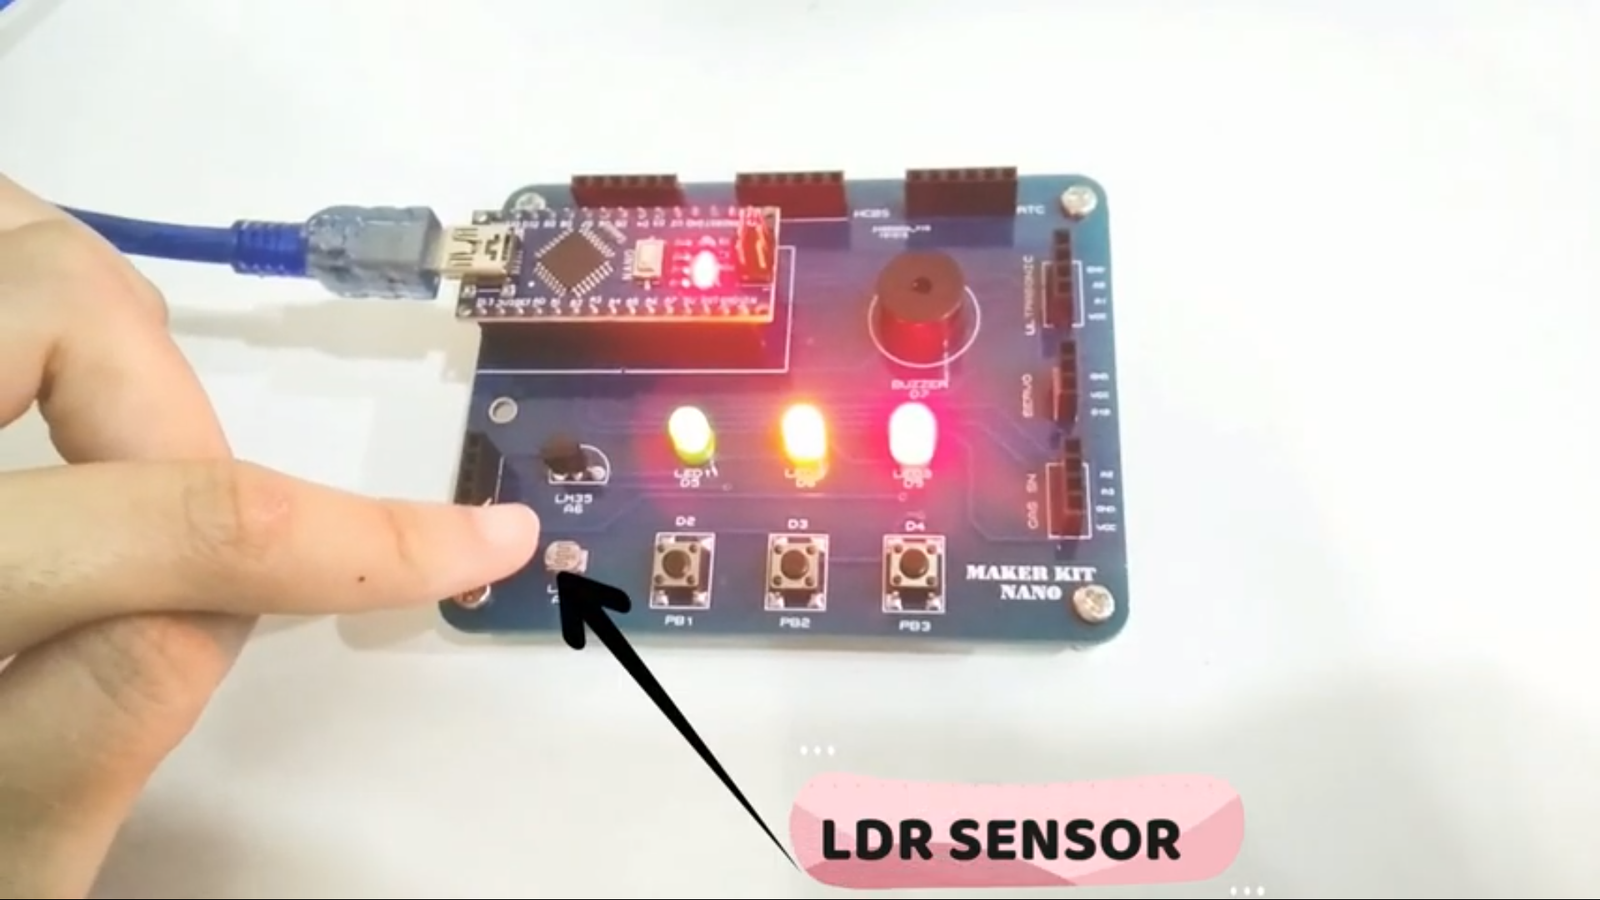
Result
All of LED will off at first and if have an object touch or cover the sensor, all LED will turn on