First Step
Open TinkerCode app in your browser
Click here to go to TinkerCode app!
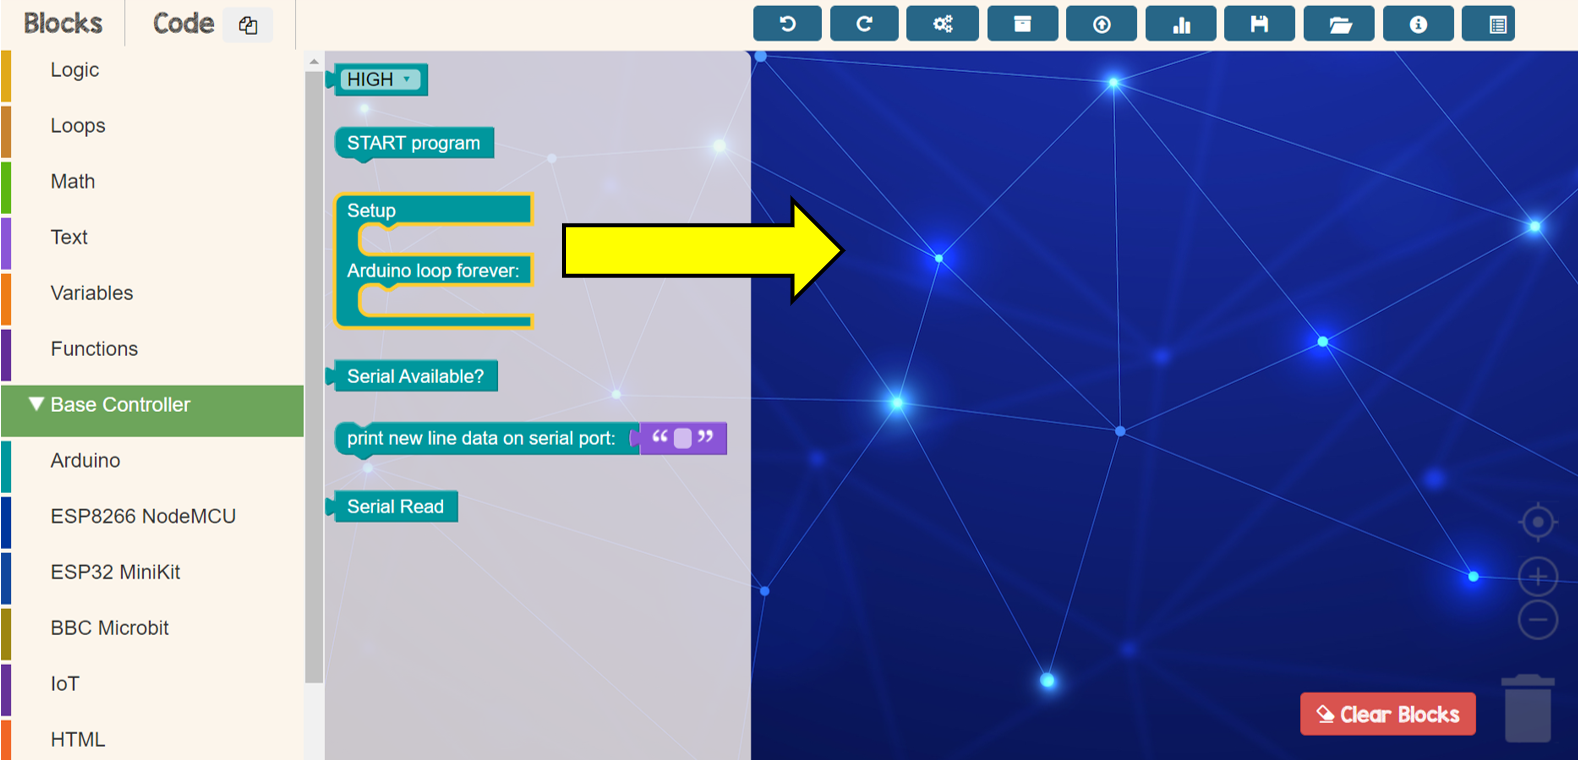
Second Step
Drop setup block and adruino loop from Base Controller menu
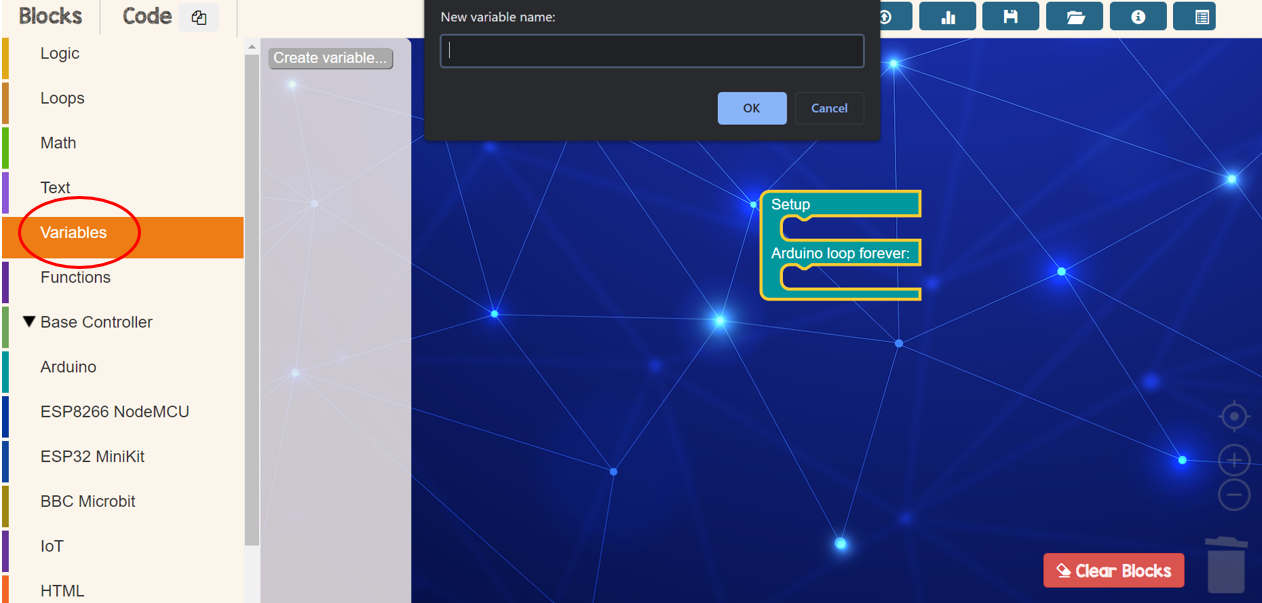
Third Step
Create new variable with any names suitable from Variables menu.
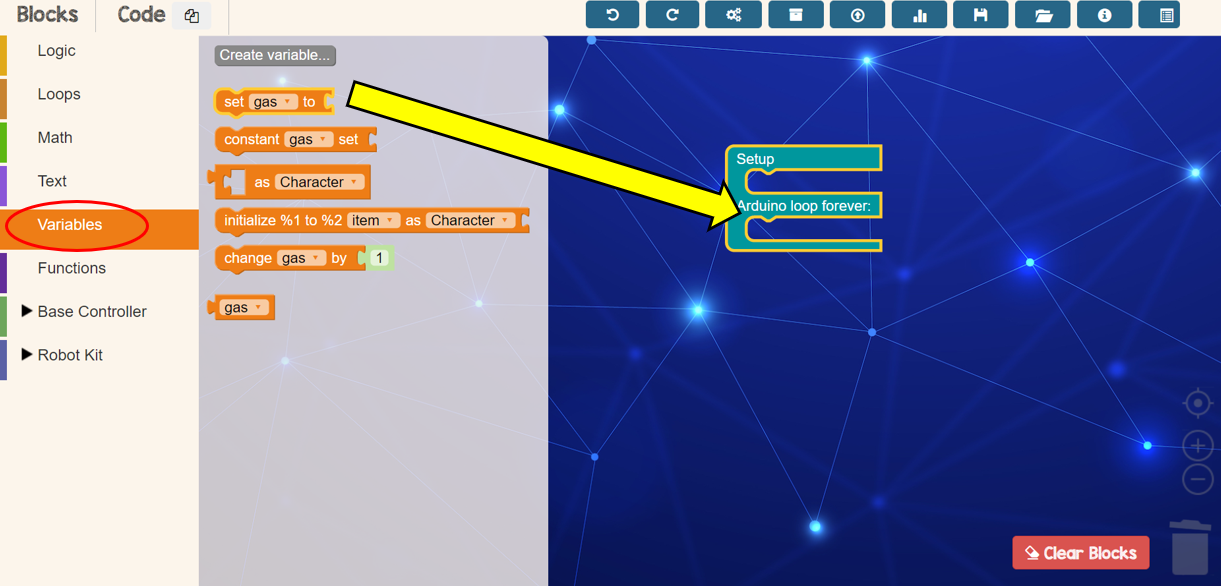
Fourth Step
Drop the variable name’s block that you created from Variable menu
Fifth Step
Drop AnalogRead block from Adruino menu and set PIN# as A2

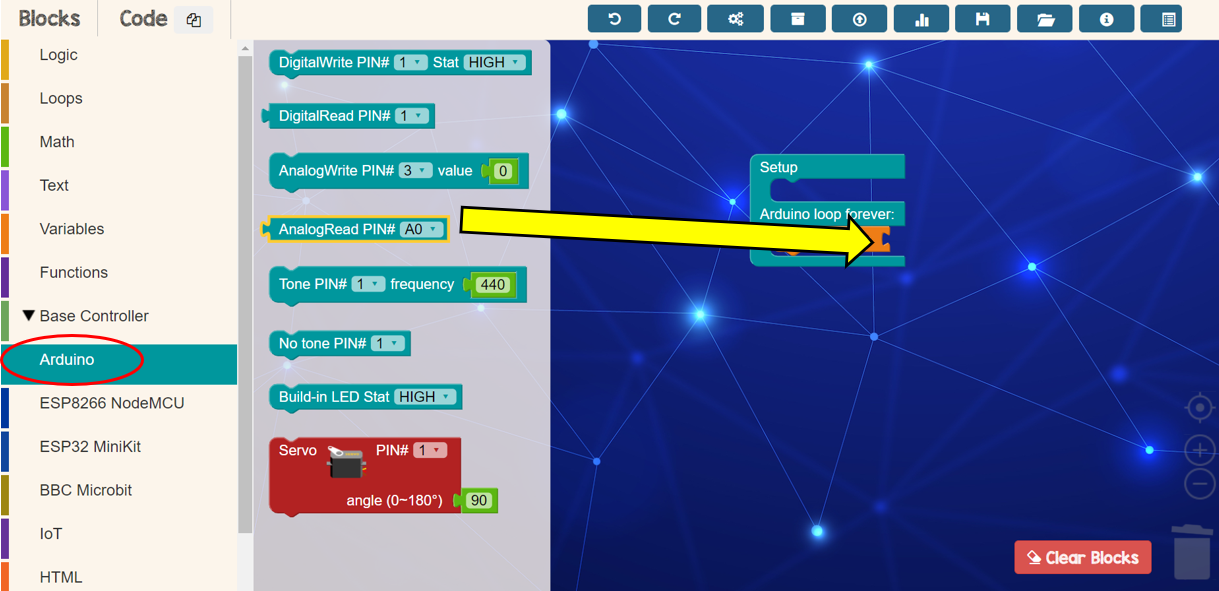
Sixth Step
From Base Controller menu, drop print new line data block and remove the purple block
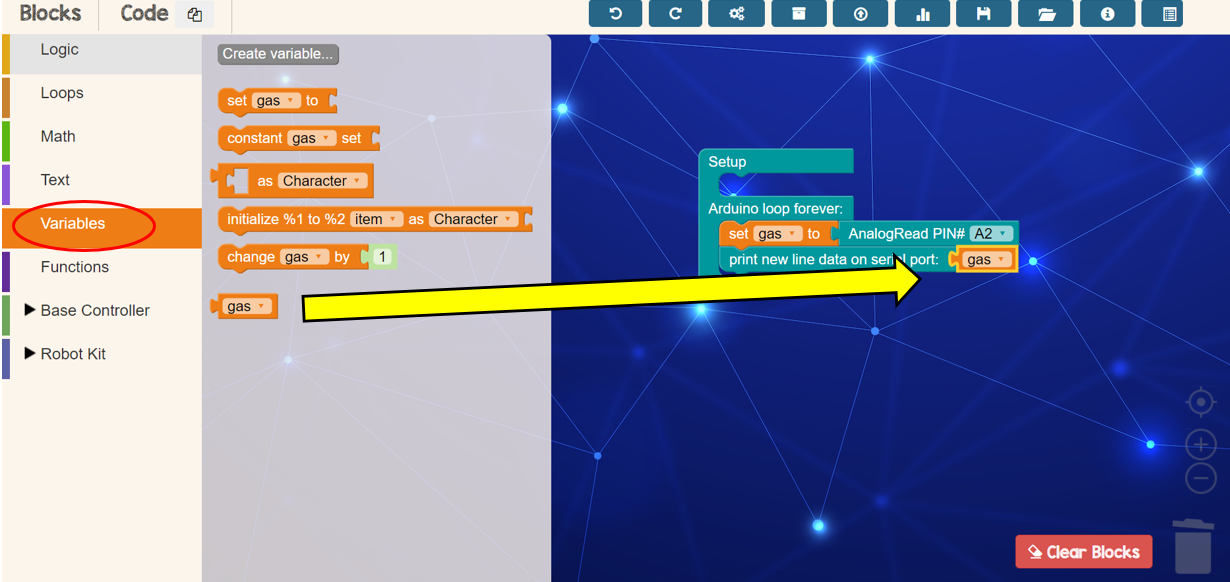
Seventh Step
Replace the purple block with variable block that you have created from Variables menu
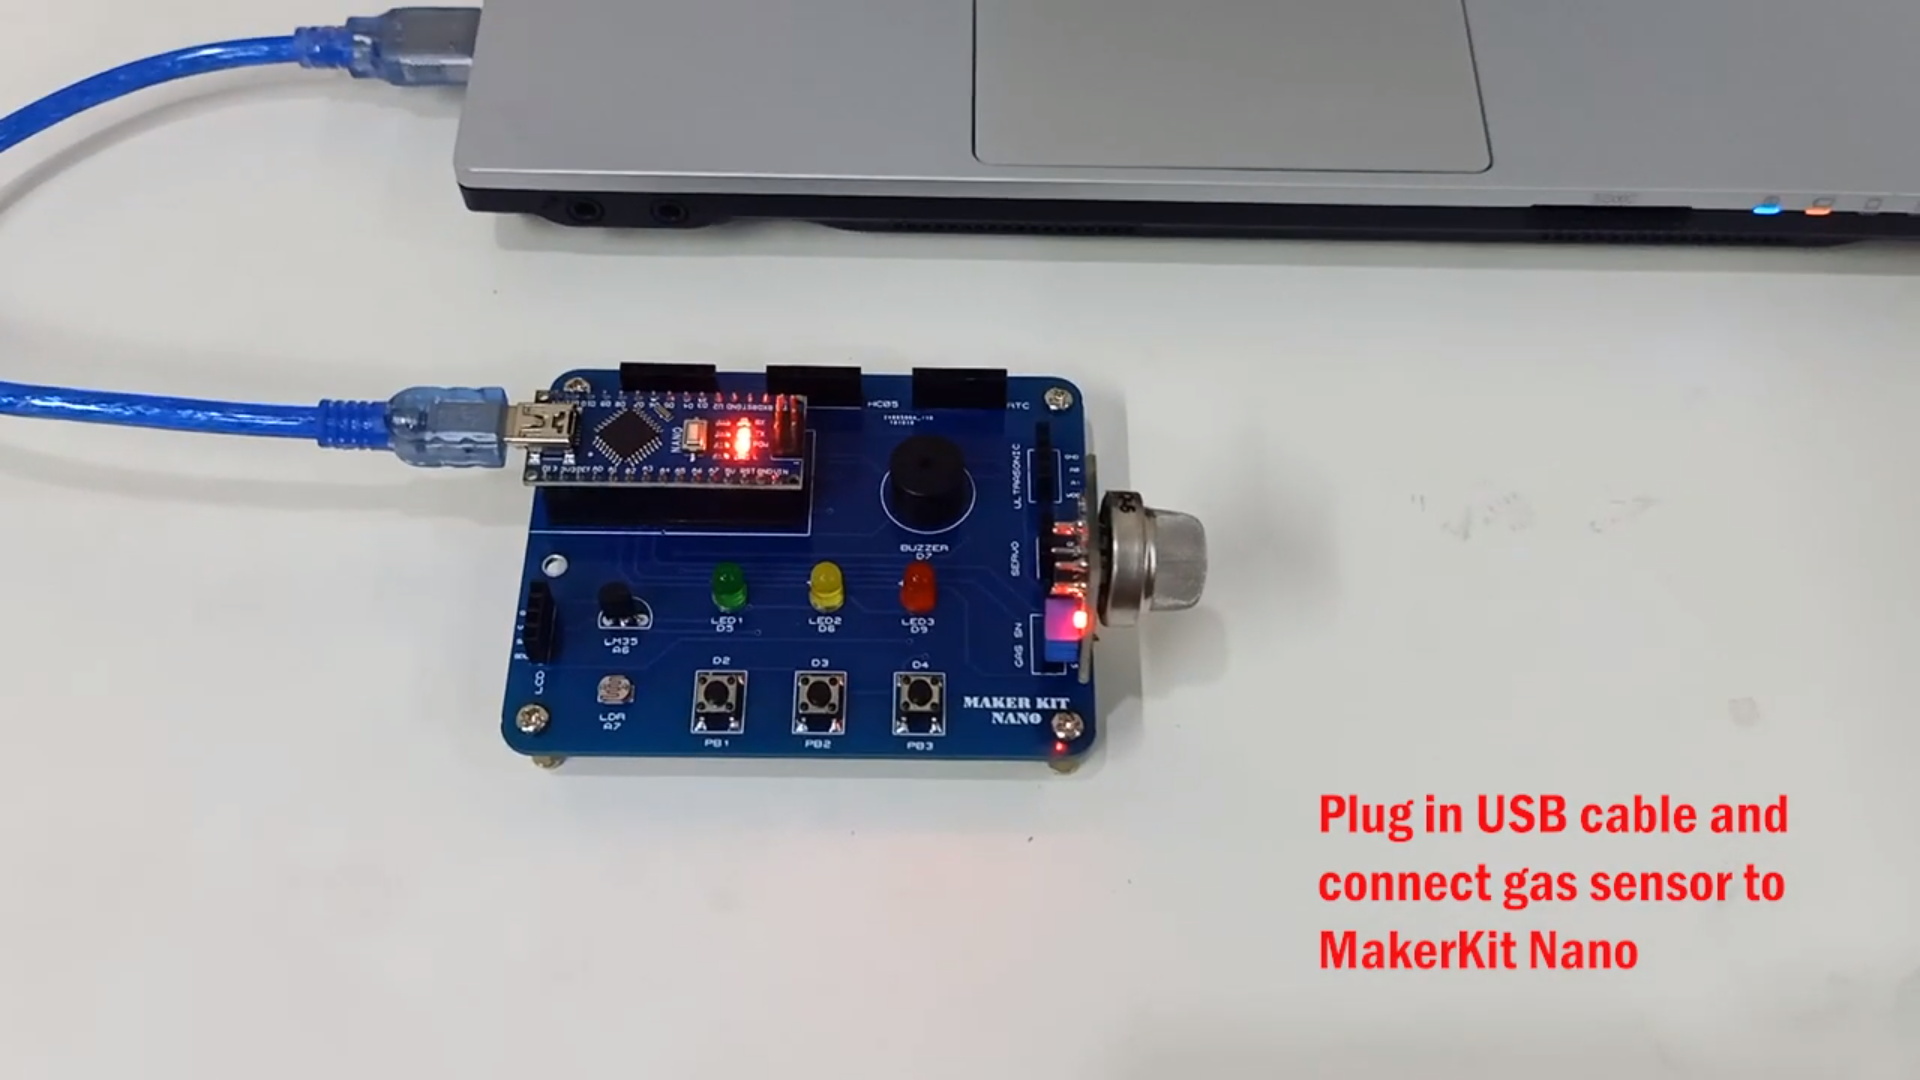
Eighth Step
Plug in USB cable to your laptop or computer and connect gas sensor to Maker Kit Nano
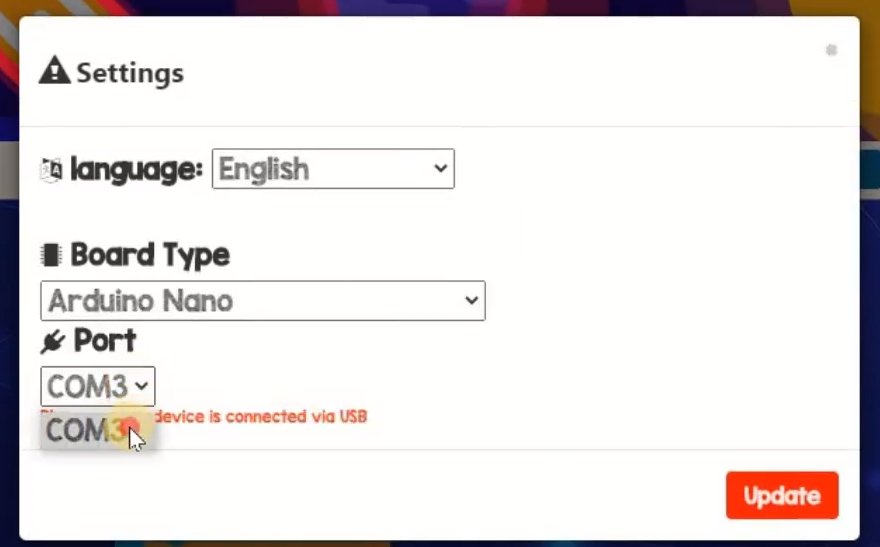
Ninth Step
Set Board Type and Port in setting according your Maker Kit port. Next, click Update button

Tenth Step
Click upload button to upload your program to Maker Kit device

Awesome pop up says your program is all set. See the result!
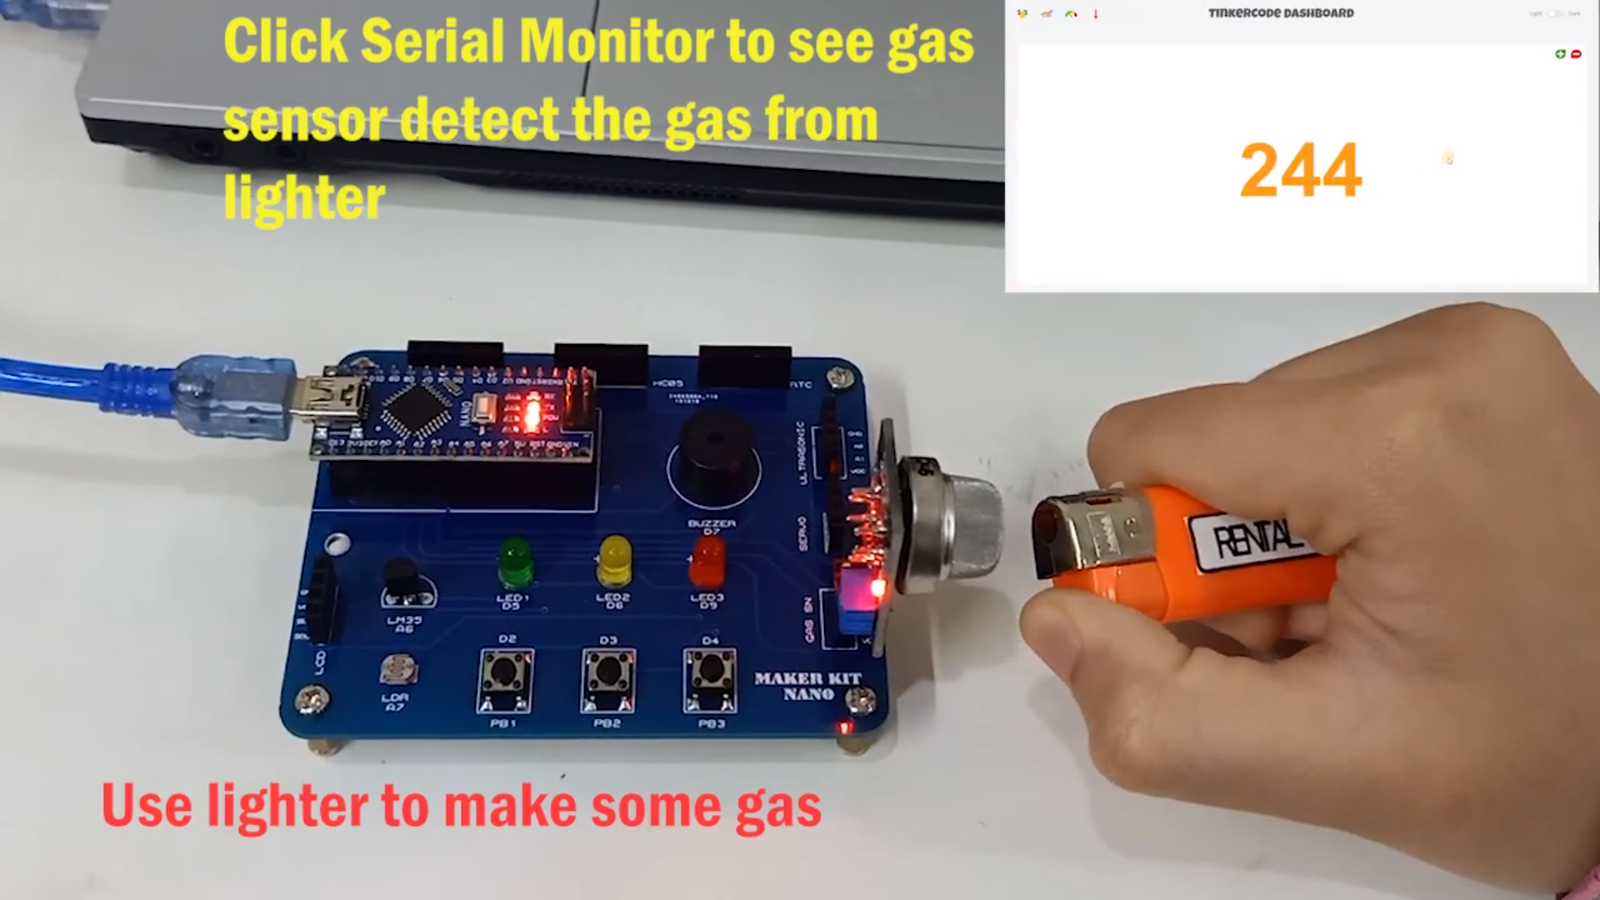
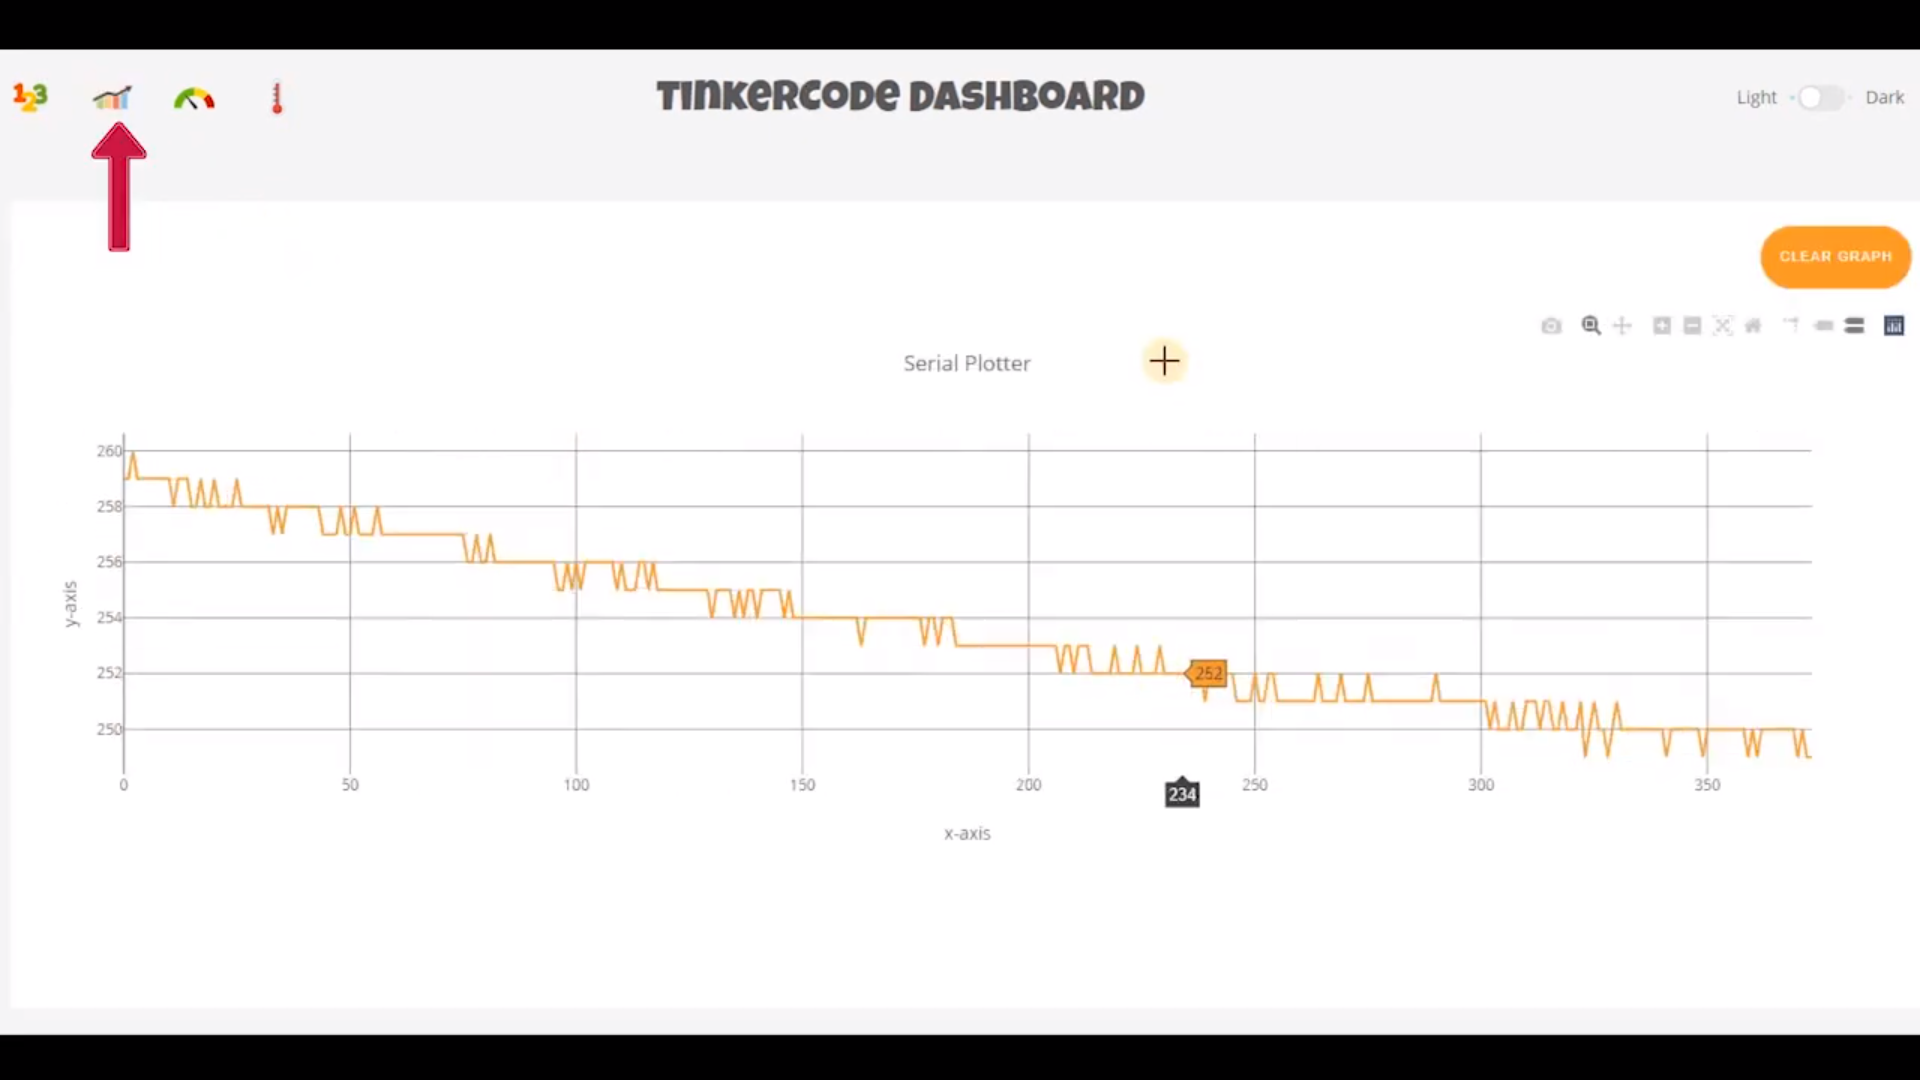
Result
Use light to make some gas to your gas sensor. You can see gas sensor detect gas from the lighter by clicking Serial Dashboard